
My initial reasons for hanging around the Adobe Illustrator forum was to look for puzzles; that is, things that people couldn’t work out how to achieve that I’d then have a think about and see if I could figure out. They’re squeezed in between complaints about Adobe CC and real beginner questions mostly, but every now and then one pops up. Here’s one I found recently that was quite satisfying to figure out:
How to make a hynpotic spiral (sic)
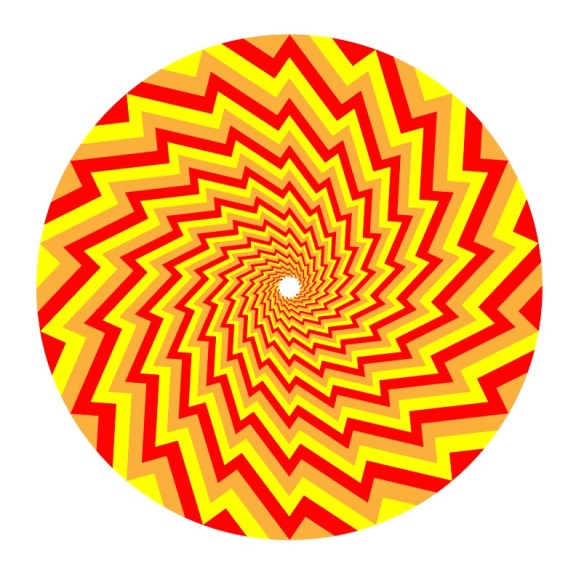
This person (who unfortunately never followed up their initial post) wanted to make something like the swirl of zigzags in this image (which I cannot credit, having no idea where it came from):

I couldn’t think of a way right off the bat. Thinking about Illustrator’s own spiral tools and brushes was a dead end, as they introduce innaccuracy and distortion. But then I stopped thinking about it in terms of a spiral, because that’s not really what it is: it’s entirely a construction of straight lines, after all. So what is it made of? Well, what solved it for me was viewing it as a set of radiating lines.

Each pair of lines will be guides for the peak and trough of the zigzag. The zig and the zag, if you will. One is rotated slightly from the other an arbitrary distance based on how sharp you want your zigzags to be. Take the rotate tool and alt/option-click on the bottom end of your first line. Type in an amount in degrees (four in this case) and click on ‘copy’.
We want an amount that divides nicely into 360, so the pair of lines is then rotated and copied 20 degrees around the centre, so we end up with the image above.
The next stage is ending up with zigzags that shrink smoothly towards the centre of the image. To do this, we want to end up with a polar grid of sorts (but don’t bother with Illustrator’s polar grid tool – it won’t save any time here). All we want is a set of circles that increase in size by a percentage each time.

Start as close to the centre as you dare – the more circles in this grid, the more work you’ll have to do. I’ve scaled this one by 110% each time. At this stage it might be worth making the whole thing into guides – you won’t need these actual lines in the spiral, they’re just here as scaffolding. Now we need to draw our zigs and zags. Make sure smart guides (ctrl + U) are turned on for this.

There are probably other viable patterns, but to get something like the original image it’s best to go three down, one up. Use smart guides and draw paths using the ‘intersect’ indicator to make sure you’re hitting where the guides cross. Keep going until you get to the centre of the circle (I’m cheating here by going for wider zigzags).
As a shortcut, you could just draw the one nearest the centre, then scale and copy 110% from the centre point of the guides, just as we did with the circles. Either way, once you’re done with one row, copy 20 degrees around the centre again to end up with this beauty.
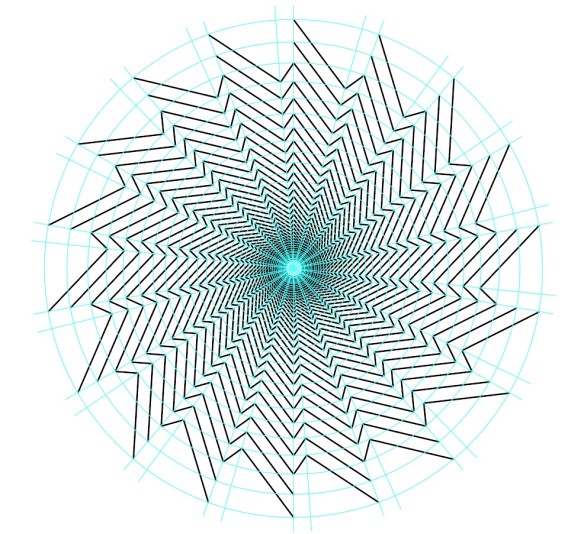
There’s some inaccuracy at very high zoom levels that I can’t quite work out; I think it may be to do with the inherent inaccuracy of bezier curve circles, but it doesn’t affect the next step too much so I’m not going to worry about it. First up make an outer circle (or other shape) to act as a bounding area for a live paint group. Then hide your guides, give all the lines no stroke, and go nuts with fill colours.
What I liked most about this is that, as a problem that could be solved with a pen and compass, this obviously must be a known solution. But as someone looking at this completely fresh, it felt good to come up with that on my own through experimentation.
